Monday, October 5, 2015

Baking One Handed: Lactation Cookies

Five days after my last post, my husband and I welcomed our little girl into the world! She's the most amazing and beautiful baby and we could not be more proud to be her parents. To anyone who has had the blessing of becoming a parent, you know how quickly your world changes, in the best way imaginable! Now my husband does most of the cooking because I'm busy nursing.
 In the past 11 weeks, I have learned to do many things one handed including laundry, hanging cloth diapers, making grilled cheese and quesadillas, and baking cookies... Lactation cookies to be more exact.  My little love is but a napper. Once she napped for 15 minutes so I quickly whipped up a batch of my regular chocolate chip cookies. They were fabulous! I had missed them! However, I have discovered a great recipe for Peanut Butter Chocolate Chip Cookies from Simplistically Living.

I follow this recipe exactly from Simplistically Living.

Ingredients:
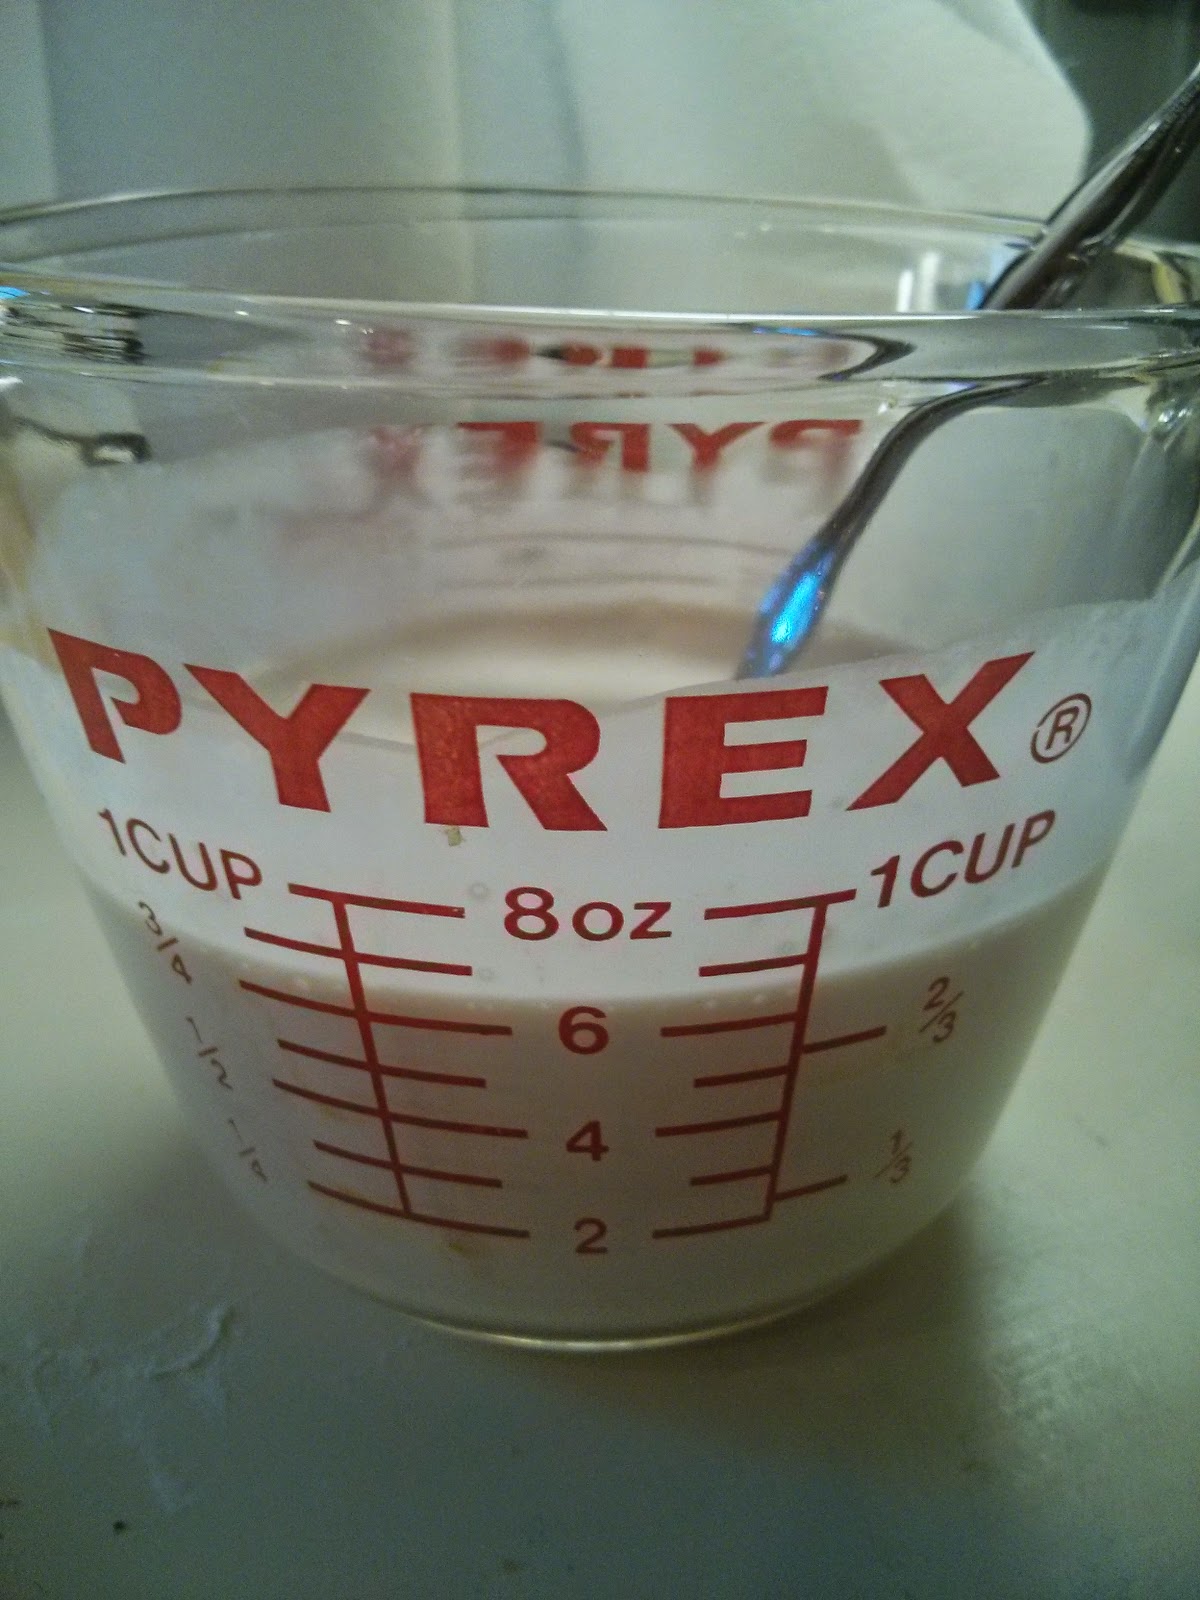
-2 Tbsp. Flaxseed meal
-4 Tbsp. Water
-1 C. Butter, softened
-1 C sugar
-1 C brown sugar
-2 eggs
-1 tsp. Each of Vanilla, cinnamonsalt, and baking soda
-3 Tbsp Peanut Butter
-4 Tbsp brewer's yeast
-2 C flour
-3 C oatmeal
-2 C chocolate chips

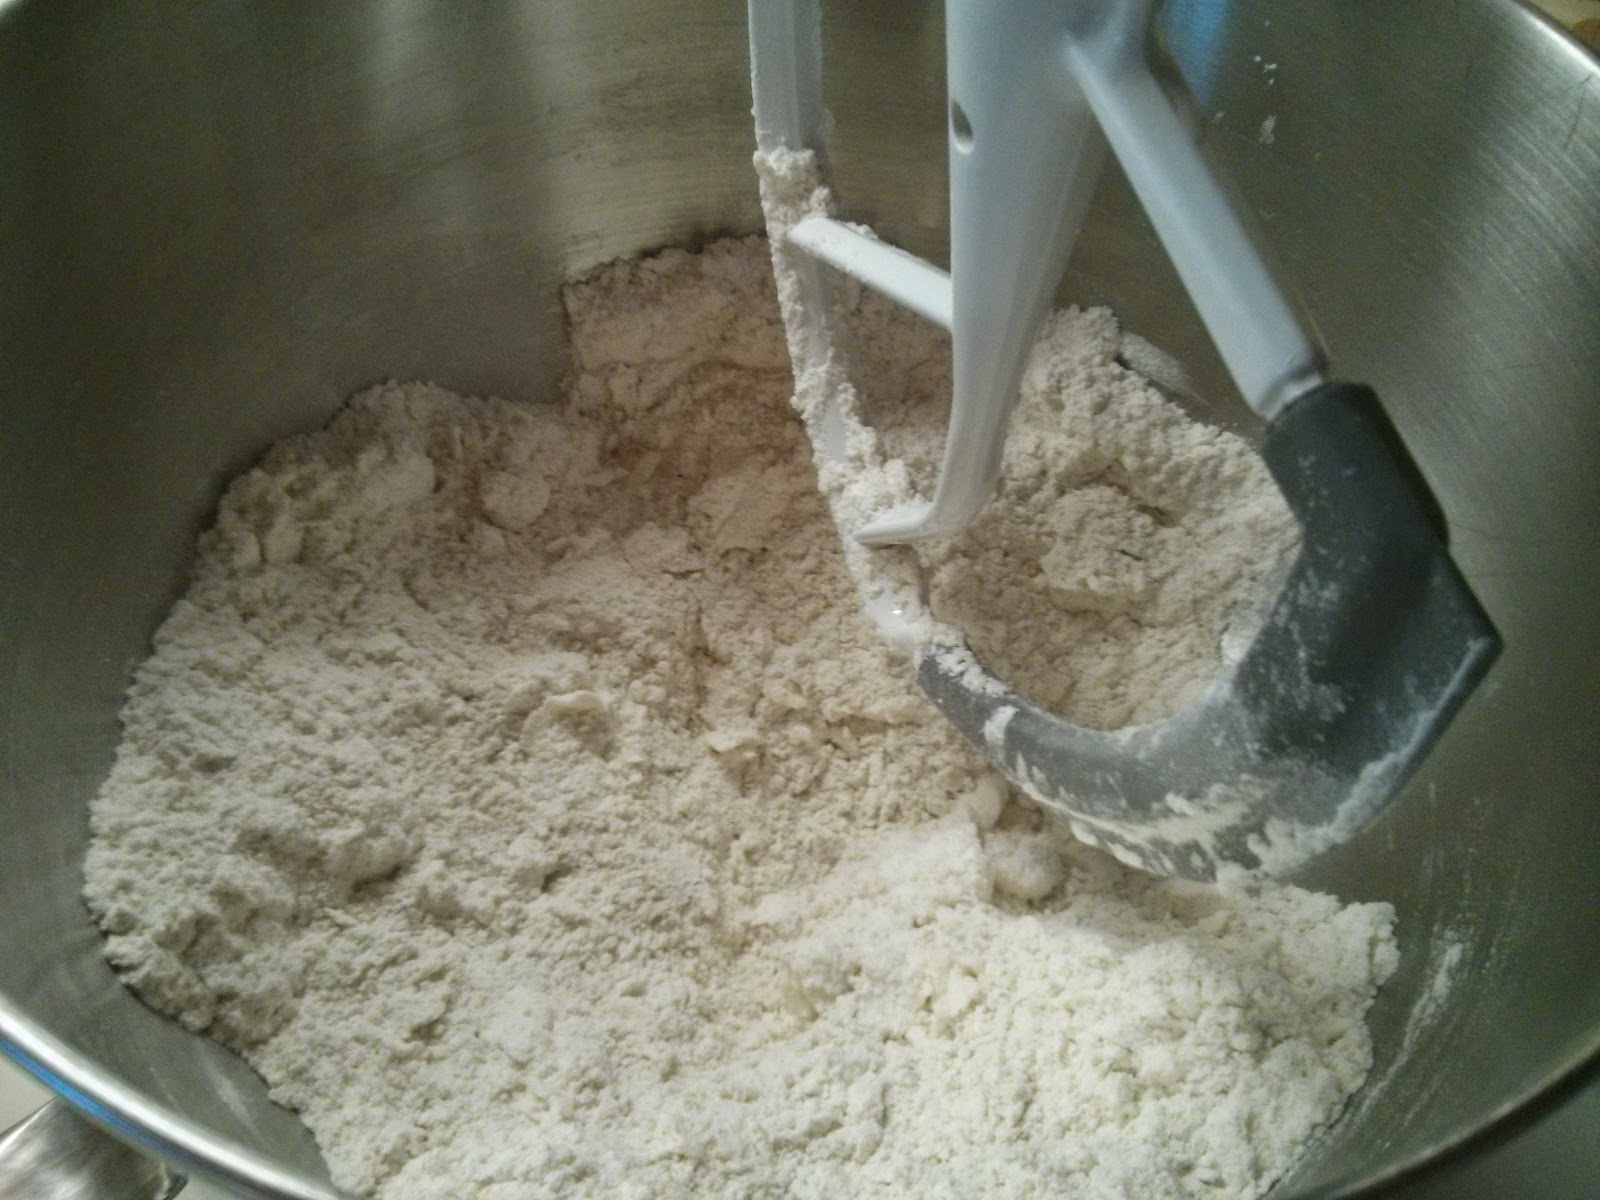
Directions: Combine the flaxseed meal and water. Let it sit while you work on the rest of the dough... Just remember to add it later! I've forgotten 2 of the 3 times I've made them and have had to add it after the chocolate chips.

Then cream butter and sugars. Beat in your eggs. Next, add vanilla, cinnamon, salt and baking soda. Then stir in the brewer's yeast and the flaxseed mixture. Continue with the peanut butter and flour. The final step in the mixer (if you're using one) is to mix in the oatmeal. The dough is super thick so I hand stir the chocolate chips.

Scoop tablespoons of dough onto a cookie sheet. This recipe will yield about 60 cookies.

Then bake at 350° for about 10 minutes. Allow to cool and enjoy!

My thoughts on the recipe?
The cookies are delicious and anyone can eat them. No, they won't make you lactate!
I love the texture of the cookies and would have been pleased with this recipe on my hunt for the best chocolate chip cookie. I keep the cookies in the freezer and eat two during late night feedings. The peanut butter flavor is faint; the cinnamon is more noticeable. The ingredients for these are pricey, but I can make the recipe several times before needing more brewer's yeast.

And in case you're wondering, thanks to Google keyboard, I wrote this whole post one handed...


Please also note, I wrote this post about two months ago, but never added the pictures so I never published the post. Better late than never, right?


Monday, May 11, 2015

Mother's Day Dessert: Lemon Blueberry Marble Cake

I began maternity leave last week and we are still anxiously awaiting the arrival of our daughter!  Last week, I spent a morning searching recipes for a cake to bake for Mother's Day, assuming our baby didn't have other plans.  I came across this recipe for Lemon Blueberry Marble Cake from Lick the Bowl Good Blog.  The blog shared that the original recipe came from the book Sky High.


I chose this recipe because it sounded nice and refreshing for a hot spring day!  While looking over the recipe, I decided I would use the short cut used on Lick the Bowl Good for the blueberry jam.  So I purchased nice blueberry jam, squeezed in the juice of one lemon and then pureed it.  Remember, I am 40+ weeks pregnant!

Then I knew I would need to change the lemon frosting recipe because the original one uses raw eggs. I've never made a recipe that uses an entire raw egg before- just egg whites.  I am curious to try it, just not while pregnant.  Luckily, I have my own lemon buttercream recipe that I LOVE.  It's the same recipe that I use for my Strawberry Lemonade Cupcakes which can be found here.

Blueberry Jam from Lick the Bowl Good
Ingredients:
-1 jar of nice blueberry jam (I used Bonne Maman)
-juice of a lemon

Squeeze the juice from a lemon and puree with the jam.  

Now on to the recipe from Sky High:

The Cake
Ingredients:
-2 sticks of butter, softened
-2 C. sugar
-2 tsp. lemon zest (I zested an entire lemon and didn't measure)
-1 1/2 tsp. lemon extract (oddly, something I always have in my baking supplies)
-7 egg whites
-3 C. cake flour (read below for my substitution)
-4 tsp. baking powder
-1/2 tsp. salt
- 1 1/4 C. milk

Cream together the butter, sugar, lemon zest, and extract.  Mix in a few egg whites at a time.  Once well combined, add in the dry ingredients alternating with the milk.  

I hate to get  a second bowl out to mix the dry ingredients. What I always do is mix in the baking powder and salt (or whatever small amounts of dry ingredients are needed).  Then I alternate adding the flour with the milk.  That saves me from having one more dish to wash! (I'd like to insert again, remember I am 40+ weeks pregnant, but I have always done this...)

Then you scoop out 1 C. of the batter.  Evenly distribute the batter between three 8" cake pans that have been greased, floured, and covered with parchment paper.  Using the reserved batter, mix in 2 1/2 Tbsp. of the blueberry jam.  Next, spoon in the blueberry batter and swirl it around to give it the marbled effect.  I used a skewer, which was recommend on the blog to swirl the batter.  I don't think it was the most effective method.  Next time, I think I would use a spoon and fold the blueberry batter in to make the cake more marbled.

Bake the cakes for 20-25 minutes at 350.  Allow the cakes to cool for about ten minutes before flipping them from the pan.  Then allow the cake to cool completely before frosting.

Use the remaining blueberry jam (I thought it was quite runny after pureeing the jam so I put it in the refrigerator it to allow to firm up a bit) to spread in between the layers of cake.


The Buttercream from me!
-1 cup butter, softened
-3 1/2 cups powdered sugar
-1 teaspoon vanilla extract
-2 tablespoons heavy cream
-juice of 1 lemon
-1/2 teaspoon lemon extract

With an electric mixer, cream together butter in a bowl. Add a 1/2 cup of powdered sugar at a time. Mix in one at a time, vanilla, cream, lemon juice and lemon extract. Scrape the sides of the bowl in between adding the ingredients. Beat on high for 10 minutes until frosting is light and fluffy.

This made enough batter for the cake since you use the jam in between the layers of cake. Frost the cake and decorate.


Don't forget the crumb coat when frosting! I think this was one of the most useful cake decorating tips I've ever received!


As always, enjoy!


Friday, May 8, 2015

Garlic Lemon Chicken Kabobs

I've been wanting to write a post with this recipe for awhile now.  This recipe is for our most loved chicken kabob recipe.  We make others when we want a break from this one, but this one just wins big every time.  This recipe for Garlic Lemon Chicken Kabobs comes from Annie's Eats blog.  This is a quick and flavorful meal.  We usually just eat the kabobs with peppers and onions and a side of some sort of fruit.


Ingredients:
-3 Tbsp. EVOO
-Zest of 1 lemon
-juice of half a lemon*
-3 cloves of garlic
-1 Tbsp. parsley (fresh or dried*)
- 1 tsp. kosher salt
-1/2 tsp. pepper

-1-2 boneless, skinless chicken breasts
-1/2 red bell pepper*
-1/2 green bell pepper*
-1 white onion*

Combine the first seven ingredients into a medium bowl.  Cube the chicken and add to the marinade.  Annie's Eats says to marinade for at least two hours.  I can tell you many times where we completely forgot and let it marinate for about 15 minutes and it still as flavorful.  Then, cut the onions and peppers into large chunks.  Skewer the marinated chicken, along with the onions and peppers.  Grill until done (about 10 minutes).

We do add some freshly squeeze lemon juice to the marinade because you are already zesting a lemon, so why not squeeze in some juice?  We don't always have fresh parsley and have had to substitute dried parsley which also works fine.

This is a recipe you want to be sure to try soon- it'll become a summer regular.  Enjoy!

Wednesday, April 22, 2015

My Favorite Chocolate Chip Cookies

I really did go about the hunt for a new chocolate chip cookie recipe because I thought I was dissatisfied with my go-to recipe.  However, after various taste tests and lots of recipe hunting I realized that I didn't like any of the recipes as much as my go-to.  After testing out many recipes, I did decide to add 1 tsp. of cornstarch to help soften the cookies.

Here is my own recipe for Oatmeal Chocolate Chip Cookies:

-2 stick of unsalted butter, softened
-1 1/4 C. brown sugar
-1/2 C. sugar
-1 egg
-1 tsp. salt
-1 tsp. baking soda
-1 tsp. pure vanilla extract
-1 tsp. cornstarch
-2 C. flour
-1 C. instant oatmeal
-3/4 C. semi-sweet chocolate chips

Preheat oven to 350.  Cream butter and sugars until well combined.  Mix in the egg.  Once well combined, add in one ingredient at a time, in the order they appear.

Drop tablespoons of cookie dough on the cookie sheet and bake for 8-10 minutes.  The cookies will be very light in color; the bottoms should be a golden brown.

I scoop out my cookies using a cookie scoop. This time I tested to see if it was better so slightly flatten them or not.  I think they tasted the same either way.  When I didn't flatten them, they need 2 more minutes to bake.

These cookies have the right amount of saltiness.  I think the oatmeal adds a nice texture and flavor without feeling like an oatmeal raisin cookie.  The dough is fabulous (not that I've eaten any for about 9 months)!  They cookies remain soft, while slightly crunchy around the edges.  Let me know what you think!

As always, happy baking!

Monday, April 13, 2015

Mexican Chocolate Cupcakes

Our local paper does a cupcake contest each spring.  I have entered a recipe the last two years and have been a finalist each time.  Apparently, I haven't ever blogged either recipe...

The first year, I entered Strawberry Lemonade Cupcakes.  This recipe was an original, but I severely adapted the frosting. Here's the write-up from the Herald Mail.

Last year, I entered our favorite cupcakes- Chocolate Peanut Butter and Carrot Cake.  For the chocolate and peanut butter cupcakes, I included an Oreo truffle filling.  For the carrot cake, I had a pineapple cream cheese filling.  My Loaded Carrot Cake was a finalist.  Here is the write-up from the Herald Mail.

Each year, my mom has said she thinks a Mexican Chocolate cupcake would be great. I have never made or eaten a Mexican chocolate cupcake (or Mexican chocolate for that matter).  Anyway, over spring break, I experimented and today, I submitted them to the Herald Mail's cupcake contest.  We shall see!

Here's the recipe for my original Mexican Chocolate Cupcakes.
I used my favorite chocolate cake recipe- King Arthur Flour's Favorite Fudge Cake.  I adapted it with some spices to make in Mexican chocolate.  Then I created a Mexican chocolate ganache.  Finally, I made a cinnamon buttercream.

Cupcake Ingredients:                                    
1 stick unsalted butter, softened
1/4 C. unsweetened cocoa powder
1/2 C. hot water
1 C. all-purpose flour
2 C. sugar
1/2 tsp. baking soda
1/4 tsp. salt
1 tsp. chili powder
1 tsp. cinnamon
1 tsp. pure vanilla extract
1/4 C. buttermilk
1 egg

Ganache Ingredients:
3/4 C. semi-sweet or dark chocolate chips
1/2 C. heavy cream
1/8 tsp. instant coffee granules
1/4 tsp. cinnamon
1/4 tsp. chili powder
1/8 tsp. cayenne pepper

Cinnamon Frosting:
1 1/2 sticks of unsalted butter, softened
2 1/4 C. powdered sugar
3/4 tsp. pure vanilla extract
3/4 tsp. salt
3/4 tsp. cinnamon
1 Tbsp. heavy cream

For cupcakes: Preheat the oven to 350 and line 12 cupcake tins with liners.  Then mix together butter and cocoa powder until smooth.  Pour in the water and mix until well combined.  Mix in the flour, sugar, baking soda, salt, chili powder, cinnamon.  Next add the vanilla and buttermilk.  Last, beat in the egg.  Your batter should be very smooth.  Distribute into 12 muffin tins and bake for about 18 minutes.


For Ganache: Melt chocolate chips and heavy cream over a double broiler.  Once melted, stir in coffee, cayenne pepper, cinnamon, and chili powder.  Allow to cool.  This will be used for the cupcake filling and to drizzle over the icing.


For Frosting:  Whip the butter in your stand mixer.  Mix in the powdered sugar and beat on high speed for several minutes.  Next, add the remaining ingredients.  Mix until well combined.


Assembly:  Core the center of the cooled cupcakes.  Scoop in about a teaspoon of the ganache.  Place the top of the cupcake back on.  Pipe on the frosting.  Drizzle ganache on top.  Enjoy!

I didn't place in the cupcake contest this year, but the recipe was well-loved and I was asked if it could be used to start off a month of home cooking recipes in the paper. Here's the link to the Herald Mail article.

Friday, April 3, 2015

Another Favorite: General Tso's Chicken

As I've mentioned before, we love Chinese food!  We make Asian style food weekly in our house.  This recipe for Skinny General Tso's Chicken comes from Carlsbad Cravings. Of course I found this recipe on Pinterest awhile make.  It is on our dinner menu regularly- well about as frequently as we would eat any of our favorites (no more than once a month).  Looking at the ingredients, yes the chicken is baked, but I do wonder is this really a "skinny" recipe?

This recipe is so full of flavor you'll be thrilled you tried it.  What you won't be so thrilled about is how many ingredients and dishes get used to make this.  Our kitchen always looks like a bomb exploded when we have finished making this.

Time after time, we forget that the original recipe has you marinade the chicken. So we usually don't do that step.  We make 1/2 of the marinade/ sauce recipe and use what we've made for the sauce.

For the Sauce:
1/4 C. soy sauce
1/4 C. rice wine vinegar
1/4 C. water
1. Tbl. sesame oil
1 tsp. Sriracha
1/4 tsp. salt
3 cloves of minced garlic
2 Tbl. freshly grated ginger (We keep ours in the freezer and use it whenever it's needed)
Sprinkle of pepper
1 Tbl. cornstarch

Whisk together all of these ingredients and wait.


For the Breading:
1 C. flour
1/2 tsp. pepper
1/4 tsp. cayenne pepper
2 Tbl. ground ginger
1 tsp. salt
1 tsp. onion powder
1 tsp. garlic powder


Egg Wash:
1 egg
1 Tbl. water

Mix the flour breading ingredients together.  Whisk together the egg and water in a separate bowl.


Then dip the chicken (we use about a pound of chicken, diced) in the egg wash.  Next coat it in the flour breading mixture.  Place the breaded chicken on a foil-lined cookie sheet and spray with EVOO.  Bake at 375 for about ten minutes.  Then flip the chicken, spray the tops with EVOO and broil for about 3 minutes on each side to make the chicken crisp.


Caramel Sauce:
1 C. sugar
1/4 C. water

In a medium sized sauce pan, bring the sugar and water to a boil for one minute.  Stir in the sauce.  At this point we usually toss in diced peppers and onions.  Once the chicken is cooked, mix the chicken into the sauce. Enjoy!


We usually have edamame and rice with this, but during the pregnancy we've been substituting the rice for couscous.

This recipe really is worth emptying out your fridge and spice cabinet.  I'll even go as far as saying it is worth all of the dishes!


Thursday, March 5, 2015

Chocolate Banana Cake and Dog Treats

I am sure it happens to you too.  You buy a bunch of bananas (Did you know a bunch of bananas is called a hand?!?)  and they become overly ripe before you eat them.  We always seem to have at least one banana that this happens to, but last week it happened to the whole hand!  I did what any baker would do- I baked with them.  

The first thing that I made was Double Chocolate Banana Cake from Friday is Cake Night.

I followed the recipe exactly, except for I didn't have mini chocolate chips so I used regular ones.

Here's what you need:
-3 ripe bananas
-3/4 C. brown sugar
-1/2 C. applesauce (I used my mom's homemade applesauce which has just a hint of cinnamon in it)
-1 tsp. vanilla
-1 egg
-1 C. flour
-1/2 C. unsweetened cocoa powder
-1 tsp. baking soda
-1/4 tsp. salt
-1 C. semi- sweet chocolate chips

I placed the peeled bananas right in my stand mixer bowl.  I figured I could let the mixer mash up the bananas.  Then I mixed in the brown sugar.  Once that was well combined, I added the applesauce, vanilla, and egg.  I kept my mixer on a low speed while I added each ingredient.  Next, came the flour, the cocoa powder, salt, and baking soda.  I scraped the sides of the bowl once and added the best part- the chocolate chips.

I baked this in a greased pan at 350 for 25 minutes.  The result?  An extremely moist, chocolaty-rich banana cake.  When I read the blog post, I thought, "This is banana bread and I would never count it as cake in my house."  Then I ate it.  Don't get me wrong, I definitely ate it as a breakfast food (after all I had it baked before 7:30 am on Saturday), but it is extremely rich and could certainly count as dessert.

Up next on my too many ripe banana extravaganza? Dog treats for my Lilybug, of course!


I have baked a lot of different types of homemade dog treats for Lily.  She's no picky eater so there haven't been any she doesn't like!  I have made peanut butter ones, ones that use beef broth, the following recipe seems to be very healthy and a huge hit of Lily's.

This recipe is for Banana Carrot Dog Treats from Homemade Dog Treats Now.  I first tried this recipe after a friend sent me the pin because carrots are by far Lily's favorite snack.  When she was a puppy, she would even take bananas out of the grocery bag and peel them herself.  I knew she would love this recipe.

The first time I made this, I followed the recipe precisely.  This time I made a few changes.
Here's what you need:
-1 C. whole wheat flour
-1 C. of oatmeal (I only had about a 1/3 of a cup so I mixed in some prepackaged instant oatmeal).*
-2 bananas*
-2 Tbsp. coconut oil
-1 1/2 C. chopped carrots*
-1 Tbsp. parsley
-1 egg

Because I switched out the plain oatmeal for packaged instant oatmeal, I omitted the tablespoon of brown sugar that the recipe calls for.  I figured the packaged oatmeal had plenty of sugar added already.  Also, since I had so many ripe bananas, I added an extra banana to this batch.  You can tell too because the banana scent is even more intense (that or it could be my pregnancy nose!).  The original recipe calls for two carrots.  I only had baby carrots on hand- I finely chopped about 1.5 cups of carrots instead.

Once again, I started by placing the bananas right in the mixer bowl and let the paddle mash the bananas.  Then I added the flour and oatmeal.   Once that was well combined, I added the remaining ingredients.

Then you can roll out the dough, I always use a heart shaped cookie cutter for Lily.  They bake at 350 for about 30 minutes.

Sunday, February 22, 2015

Cinnamon Chocolate Chip Scones

There is no better treat than homemade breakfast during the week!  On Friday, our schools had a two hour delay so I was able to whip something up for breakfast. I usually make pancakes (from scratch) because that's what my mom always did.  I decided not to because I made pancakes last week and caught the stomach bug.  Let's say I wasn't ready for pancakes again.

On that note...

As I stayed snuggled up in my bed and on Pinterest, each recipe I thought sounded great, I didn't have all of the ingredients on hand.  Then I remembered seeing a pin for Chocolate Chip Scones that looked good.  For whatever reason, I hadn't pinned it.  I found the recipe for Chocolate Chip Scones from Sally's Baking Addiction.  Luckily, I had everything I needed (basically).


Ingredients:
-8 Tbl. of unsalted butter (cut into chunks)
-2 C. flour
-2 1/2 tsp. baking powder
-1 tsp. cinnamon
-1/2 tsp. salt
-1/2 C. heavy cream
-1 egg
-1 tsp. vanilla extract
-1 C. semi-sweet chocolate chips

I used the same measurements that were posted on Sally's Baking Addiction.  My only ingredient change was that I didn't use the mini semi-sweet chocolate chips. The scones were great with regular chocolate morsels.


The process I used to make the scones differed slightly.
Here's what I did:
First, cut the cold butter into chunks.  Place it in the bowl of the stand mixer.  Stir in the flour.  Allow the flour and butter to mix until the butter is broken into small, pea-sized pieces.  Then add the remaining dry ingredients.


In a separate dish, gently whisk the heavy cream, eggs, and vanilla.


Next, pour the liquids into the dry ingredients and mix until well combined.  Last, add the chocolate chips and stir until the chips are nicely distributed.


Once your dough is set, I divided it into two mounds of dough.  I rolled out each mound of dough to about a 1/2 inch thick disc.  Then I divided each disc into eight slices and placed on a baking sheet covered with parchment paper.  This resulted in 16 scones.  I baked the scones at 400 for 17 minutes.

I was a fan of these scones! I decided to call them Cinnamon Chocolate Chip scones because the cinnamon flavor isn't subtle.  This process for using the mixer is the same way I make all of my scones now.  This method has worked out well for me and was the one I shared back here with Lemon Cream Scones.


As always, happy baking!

Monday, February 16, 2015

Red Velvet Oreo Truffles

A few weeks ago, in  a post, I mentioned how I bought these:  Red Velvet Oreos.
When I first heard that Nabisco was making Red Velvet Oreos, my very first thought was "Red Velvet Oreo Truffles?!"

Have you ever eaten Oreo Truffles?  The recipe is all over the internet and can be found on Kraft's website.

Let me tell you...The first time I had Oreo truffles I thought I had eaten a tiny, bit of heaven.  A neighbor had made them and given some to my mom.  My mom was raving about them and was generous enough to share.  I've made Oreo truffles many times.  They take almost no time, but are incredibly delicious!

I have even made brownies and topped them with Oreo truffle and then topped that with melted chocolate.  That's a recipe I should bake again!

Anyway, I tracked down some Red Velvet Oreos the day they were released- February 2.  Who knew that cookies had a release date?  I bought two packages and was waiting until Valentine's to pull open the seal and try these Oreos.

The cookie by itself was good, but definitely not my favorite kind of Oreo (am I right, Sarah?)  That could start me on an embarrassing tangent about , but I won't go there...
Oreos

What You Need:
-2 packages of Red Velvet Oreos (for truffles you need 36 and these only come in small packages)
-8 oz. of cream cheese (I always opt for the 1/3 reduced fat cream cheese- that way they're "healthy")
-melting chocolate of choice, I use Candy Melts
-Sprinkles or additional crushed Oreos for decoration

In a food processor, crush 36 Oreos.  Transfer Oreo crumbs to stand mixer bowl.  Stir in softened cream cheese.

Then mold the mixture into small balls and place on a cookie sheet.  Freeze the truffles for about 15 minutes.  This step makes the dipping easier.

Then dip in your favorite melting chocolate.  For this, I used white chocolate.  Candy Melts also has a Red Velvet flavor which I was tempted to try, but I didn't want the truffles to be too overpowering in their red velvet flavoring.

After making many cake pops, I must say that dipping these truffles without being on a stick was a pain!  When you make cake pops, you can tap off the extra chocolate and end up with a smoother coating. Before the chocolate hardens, top with your choice of sprinkles.  Keep in the fridge and enjoy!

I have to confess that I have only eaten one. One. Yes,  you read that correctly. I am recovering from the flu and haven't gotten my appetite yet.  Everyone who I've shared them with loves them though!

Tuesday, February 10, 2015

Steak and Onion Sandwiches

Our final recipe from the week was Steak and Onion Sandwiches and it was by far our favorite!  This recipe can be found on Martha Stewart's website or in her book Everyday Food:  Great Food Fast.

This was once again, a quick and flavorful weeknight meal. We loved it so much we made it again for lunch over the weekend.

The recipe calls for onions, EVOO, salt, pepper, Worcestershire sauce, Steak-umms, and country bread.

We decided we would use flank steak, slice thinned instead. We also bought a baguette for the bread.
Basically, you brown the onions in EVOO, until softened.  Then you remove the onions and cook the steak.  Season the steak with salt and pepper. Next, pour in the Worcestershire sauce and a bit of water.  Dump the onions back in to combine.  Then top on the bread.  The end!

We didn't follow the measurements that Martha gave, but we used it as a guideline.  We will try this recipe with Steak-umms at some point.  I think it would also be tasty topped with cheese.

As a side with this dish we made "Shredded Beet and Carrot Salad."  I couldn't find the recipe online, but it is in the book. I have no pictures of this because I finely shredded the beats using my food processor attachment to my Kitchenaid. This was way too fine and resulted in a juicy, but tasty, mess.

Saturday, February 7, 2015

Garlic Marinated Chicken and "Grilled" Potatoes

Here's another quick and flavorful recipe from Everyday Food:  Great Food Fast.  We made Garlic Marinated Chicken with Grilled Potatoes.  I put "grilled" in quotes because we are not the type of people who grill year round so we broiled our potatoes.

Since it's just the two of us, we cut the recipe in about 1/3.  We washed and chopped the potatoes in half and created a foil pocket.  We stuck them in the oven to broil and began to marinate the chicken.

We allowed our chicken to marinade for about 15 minutes- the original recipe says 10-30 minutes.  We also roasted asparagus, like Martha calls for, but we simply roasted the asparagus with EVOO, salt and pepper.

The chicken and asparagus game together quickly.  We ended up microwaving our potatoes because after over 30 minutes of broiling, the potatoes were crispy looking but still very, very raw.  It is interesting to think the potatoes would have been done in less time and at a slower temperature...

Aside from the potatoes, this meal was a huge success!  Again, the chicken was moist and full of flavor. We ate the chicken and asparagus before the potatoes were done.

Check out some other quick weeknight meal ideas I've tried from Everyday Food: Great Food Fast:
-Lemon Parsley Pork Chops
-Beef and Orange Stir Fry
-Orecchiette with Sausage and Roasted Peppers


Friday, February 6, 2015

Lemon Parsley Pork Chops

Clearly I was unable to write posts each day last week to coincide with the new recipes we were trying from Everyday Food:  Great Food Fast.  I'll try to wrap it up this weekend!

The third recipe we made from Everyday food was for Lemon Parsley Pork Chops.  Yet again, this recipe provided a simple, fast, and delicious weeknight meal!  I actually followed the recipe completely, so be sure to check it out in the book or on Martha's website.

All that you need to make this tasty meal is lemon zest, parsley, garlic, salt, pepper, EVOO, and pork chops. I love it when a recipe is so simple and it doesn't require 10 million ingredients being pulled from your fridge and pantry.  We served this green beans and baked potatoes.  The result was two very happy campers!

First you mix the first 4 ingredients.  

Cook the pork chops on the stove.

Once cooked, top the pork chops with the lemon and parsley combo.  


That's it! The pork chops were full of flavor.  There's no reason to not give this recipe a try!

Other Feedback from  the recipes we've Tried from Everyday Food:  Great Food Fast

Stay tuned for 3 more reviews to come.


Monday, February 2, 2015

Beef and Orange Stir Fry

Up next in our recipes from Everyday Food:  Great Food Fast, we made Beef and Orange Stir Fry. The recipe is in the book and available online. You've read my rants for my love of Chinese food and Orange Beef is one of my favorites- especially from Fuji.  So of course this dish sounded quite appealing to the two of us.

Martha Stewart's turned out much prettier than mine did...


This recipe was very simple to make and required a minimal amount of ingredients.  The original recipe does call for boneless sirloin or rib eye and we used flank steak. We decided to use flank steak because when making Mongolian beef the recipe calls for sirloin or flank steak and it is much, much better with flank steak.  Aside from switching the cut of beef, we followed the recipe exactly.

Ingredients:
-3 oranges
-2 cloves of garlic
-2 Tbl. soy sauce
-1 to 1.5 lbs of flank steak
-1 Tbl. cornstarch
-2 Tbl. canola oil
-a few scallions

For the sauce:  Juice one orange and add the garlic and soy sauce.  We were both surprised this recipe didn't call for any ginger, which is probably something we'll add next time.

For the meat:  Slice the meat thin.  Then, heat the oil.  Coat the flank steak in corn starch and cook a few minutes on each side until browned.  Then pour the sauce in.

For the remaining oranges:  You don't want to peel the other oranges.  You are going to cut them in sections and remove the pith.  Once the steak is cooked and the sauce is added toss in the scallions and the oranges.

I am sure this would be great over rice, but I haven't wanted anything to do with rice since I've been pregnant.  We ate this with couscous.

As I mentioned, next time I think we'd add ginger to the sauce.  This was a quick and flavorful meal to make during the week.

On another note, I bought these today...
My first thought when I heard about them was Red Velvet Oreo Truffles! Mmm! I cannot wait to give those a try!