Showing posts with label Chocolate. Show all posts

Wednesday, April 22, 2015

My Favorite Chocolate Chip Cookies

I really did go about the hunt for a new chocolate chip cookie recipe because I thought I was dissatisfied with my go-to recipe.  However, after various taste tests and lots of recipe hunting I realized that I didn't like any of the recipes as much as my go-to.  After testing out many recipes, I did decide to add 1 tsp. of cornstarch to help soften the cookies.

Here is my own recipe for Oatmeal Chocolate Chip Cookies:

-2 stick of unsalted butter, softened
-1 1/4 C. brown sugar
-1/2 C. sugar
-1 egg
-1 tsp. salt
-1 tsp. baking soda
-1 tsp. pure vanilla extract
-1 tsp. cornstarch
-2 C. flour
-1 C. instant oatmeal
-3/4 C. semi-sweet chocolate chips

Preheat oven to 350.  Cream butter and sugars until well combined.  Mix in the egg.  Once well combined, add in one ingredient at a time, in the order they appear.

Drop tablespoons of cookie dough on the cookie sheet and bake for 8-10 minutes.  The cookies will be very light in color; the bottoms should be a golden brown.

I scoop out my cookies using a cookie scoop. This time I tested to see if it was better so slightly flatten them or not.  I think they tasted the same either way.  When I didn't flatten them, they need 2 more minutes to bake.

These cookies have the right amount of saltiness.  I think the oatmeal adds a nice texture and flavor without feeling like an oatmeal raisin cookie.  The dough is fabulous (not that I've eaten any for about 9 months)!  They cookies remain soft, while slightly crunchy around the edges.  Let me know what you think!

As always, happy baking!

Monday, April 13, 2015

Mexican Chocolate Cupcakes

Our local paper does a cupcake contest each spring.  I have entered a recipe the last two years and have been a finalist each time.  Apparently, I haven't ever blogged either recipe...

The first year, I entered Strawberry Lemonade Cupcakes.  This recipe was an original, but I severely adapted the frosting. Here's the write-up from the Herald Mail.

Last year, I entered our favorite cupcakes- Chocolate Peanut Butter and Carrot Cake.  For the chocolate and peanut butter cupcakes, I included an Oreo truffle filling.  For the carrot cake, I had a pineapple cream cheese filling.  My Loaded Carrot Cake was a finalist.  Here is the write-up from the Herald Mail.

Each year, my mom has said she thinks a Mexican Chocolate cupcake would be great. I have never made or eaten a Mexican chocolate cupcake (or Mexican chocolate for that matter).  Anyway, over spring break, I experimented and today, I submitted them to the Herald Mail's cupcake contest.  We shall see!

Here's the recipe for my original Mexican Chocolate Cupcakes.
I used my favorite chocolate cake recipe- King Arthur Flour's Favorite Fudge Cake.  I adapted it with some spices to make in Mexican chocolate.  Then I created a Mexican chocolate ganache.  Finally, I made a cinnamon buttercream.

Cupcake Ingredients:                                    
1 stick unsalted butter, softened
1/4 C. unsweetened cocoa powder
1/2 C. hot water
1 C. all-purpose flour
2 C. sugar
1/2 tsp. baking soda
1/4 tsp. salt
1 tsp. chili powder
1 tsp. cinnamon
1 tsp. pure vanilla extract
1/4 C. buttermilk
1 egg

Ganache Ingredients:
3/4 C. semi-sweet or dark chocolate chips
1/2 C. heavy cream
1/8 tsp. instant coffee granules
1/4 tsp. cinnamon
1/4 tsp. chili powder
1/8 tsp. cayenne pepper

Cinnamon Frosting:
1 1/2 sticks of unsalted butter, softened
2 1/4 C. powdered sugar
3/4 tsp. pure vanilla extract
3/4 tsp. salt
3/4 tsp. cinnamon
1 Tbsp. heavy cream

For cupcakes: Preheat the oven to 350 and line 12 cupcake tins with liners.  Then mix together butter and cocoa powder until smooth.  Pour in the water and mix until well combined.  Mix in the flour, sugar, baking soda, salt, chili powder, cinnamon.  Next add the vanilla and buttermilk.  Last, beat in the egg.  Your batter should be very smooth.  Distribute into 12 muffin tins and bake for about 18 minutes.


For Ganache: Melt chocolate chips and heavy cream over a double broiler.  Once melted, stir in coffee, cayenne pepper, cinnamon, and chili powder.  Allow to cool.  This will be used for the cupcake filling and to drizzle over the icing.


For Frosting:  Whip the butter in your stand mixer.  Mix in the powdered sugar and beat on high speed for several minutes.  Next, add the remaining ingredients.  Mix until well combined.


Assembly:  Core the center of the cooled cupcakes.  Scoop in about a teaspoon of the ganache.  Place the top of the cupcake back on.  Pipe on the frosting.  Drizzle ganache on top.  Enjoy!

I didn't place in the cupcake contest this year, but the recipe was well-loved and I was asked if it could be used to start off a month of home cooking recipes in the paper. Here's the link to the Herald Mail article.

Thursday, March 5, 2015

Chocolate Banana Cake and Dog Treats

I am sure it happens to you too.  You buy a bunch of bananas (Did you know a bunch of bananas is called a hand?!?)  and they become overly ripe before you eat them.  We always seem to have at least one banana that this happens to, but last week it happened to the whole hand!  I did what any baker would do- I baked with them.  

The first thing that I made was Double Chocolate Banana Cake from Friday is Cake Night.

I followed the recipe exactly, except for I didn't have mini chocolate chips so I used regular ones.

Here's what you need:
-3 ripe bananas
-3/4 C. brown sugar
-1/2 C. applesauce (I used my mom's homemade applesauce which has just a hint of cinnamon in it)
-1 tsp. vanilla
-1 egg
-1 C. flour
-1/2 C. unsweetened cocoa powder
-1 tsp. baking soda
-1/4 tsp. salt
-1 C. semi- sweet chocolate chips

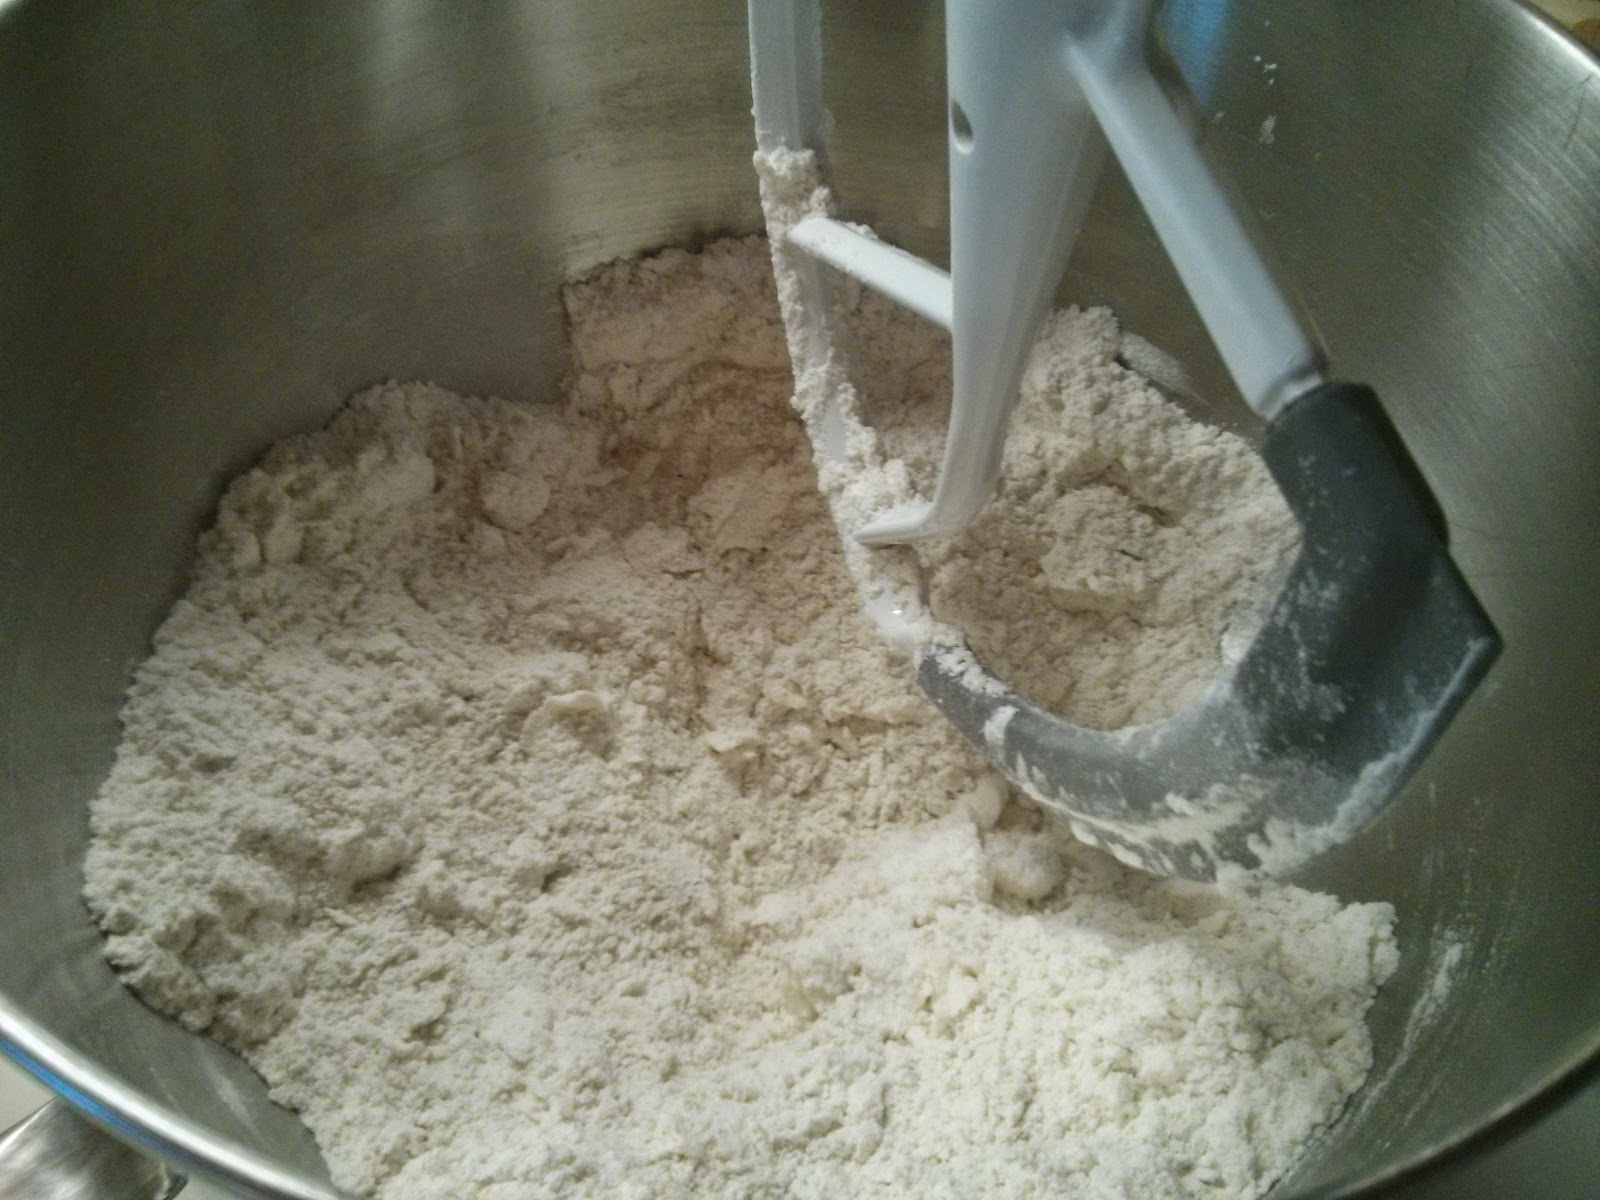
I placed the peeled bananas right in my stand mixer bowl.  I figured I could let the mixer mash up the bananas.  Then I mixed in the brown sugar.  Once that was well combined, I added the applesauce, vanilla, and egg.  I kept my mixer on a low speed while I added each ingredient.  Next, came the flour, the cocoa powder, salt, and baking soda.  I scraped the sides of the bowl once and added the best part- the chocolate chips.

I baked this in a greased pan at 350 for 25 minutes.  The result?  An extremely moist, chocolaty-rich banana cake.  When I read the blog post, I thought, "This is banana bread and I would never count it as cake in my house."  Then I ate it.  Don't get me wrong, I definitely ate it as a breakfast food (after all I had it baked before 7:30 am on Saturday), but it is extremely rich and could certainly count as dessert.

Up next on my too many ripe banana extravaganza? Dog treats for my Lilybug, of course!


I have baked a lot of different types of homemade dog treats for Lily.  She's no picky eater so there haven't been any she doesn't like!  I have made peanut butter ones, ones that use beef broth, the following recipe seems to be very healthy and a huge hit of Lily's.

This recipe is for Banana Carrot Dog Treats from Homemade Dog Treats Now.  I first tried this recipe after a friend sent me the pin because carrots are by far Lily's favorite snack.  When she was a puppy, she would even take bananas out of the grocery bag and peel them herself.  I knew she would love this recipe.

The first time I made this, I followed the recipe precisely.  This time I made a few changes.
Here's what you need:
-1 C. whole wheat flour
-1 C. of oatmeal (I only had about a 1/3 of a cup so I mixed in some prepackaged instant oatmeal).*
-2 bananas*
-2 Tbsp. coconut oil
-1 1/2 C. chopped carrots*
-1 Tbsp. parsley
-1 egg

Because I switched out the plain oatmeal for packaged instant oatmeal, I omitted the tablespoon of brown sugar that the recipe calls for.  I figured the packaged oatmeal had plenty of sugar added already.  Also, since I had so many ripe bananas, I added an extra banana to this batch.  You can tell too because the banana scent is even more intense (that or it could be my pregnancy nose!).  The original recipe calls for two carrots.  I only had baby carrots on hand- I finely chopped about 1.5 cups of carrots instead.

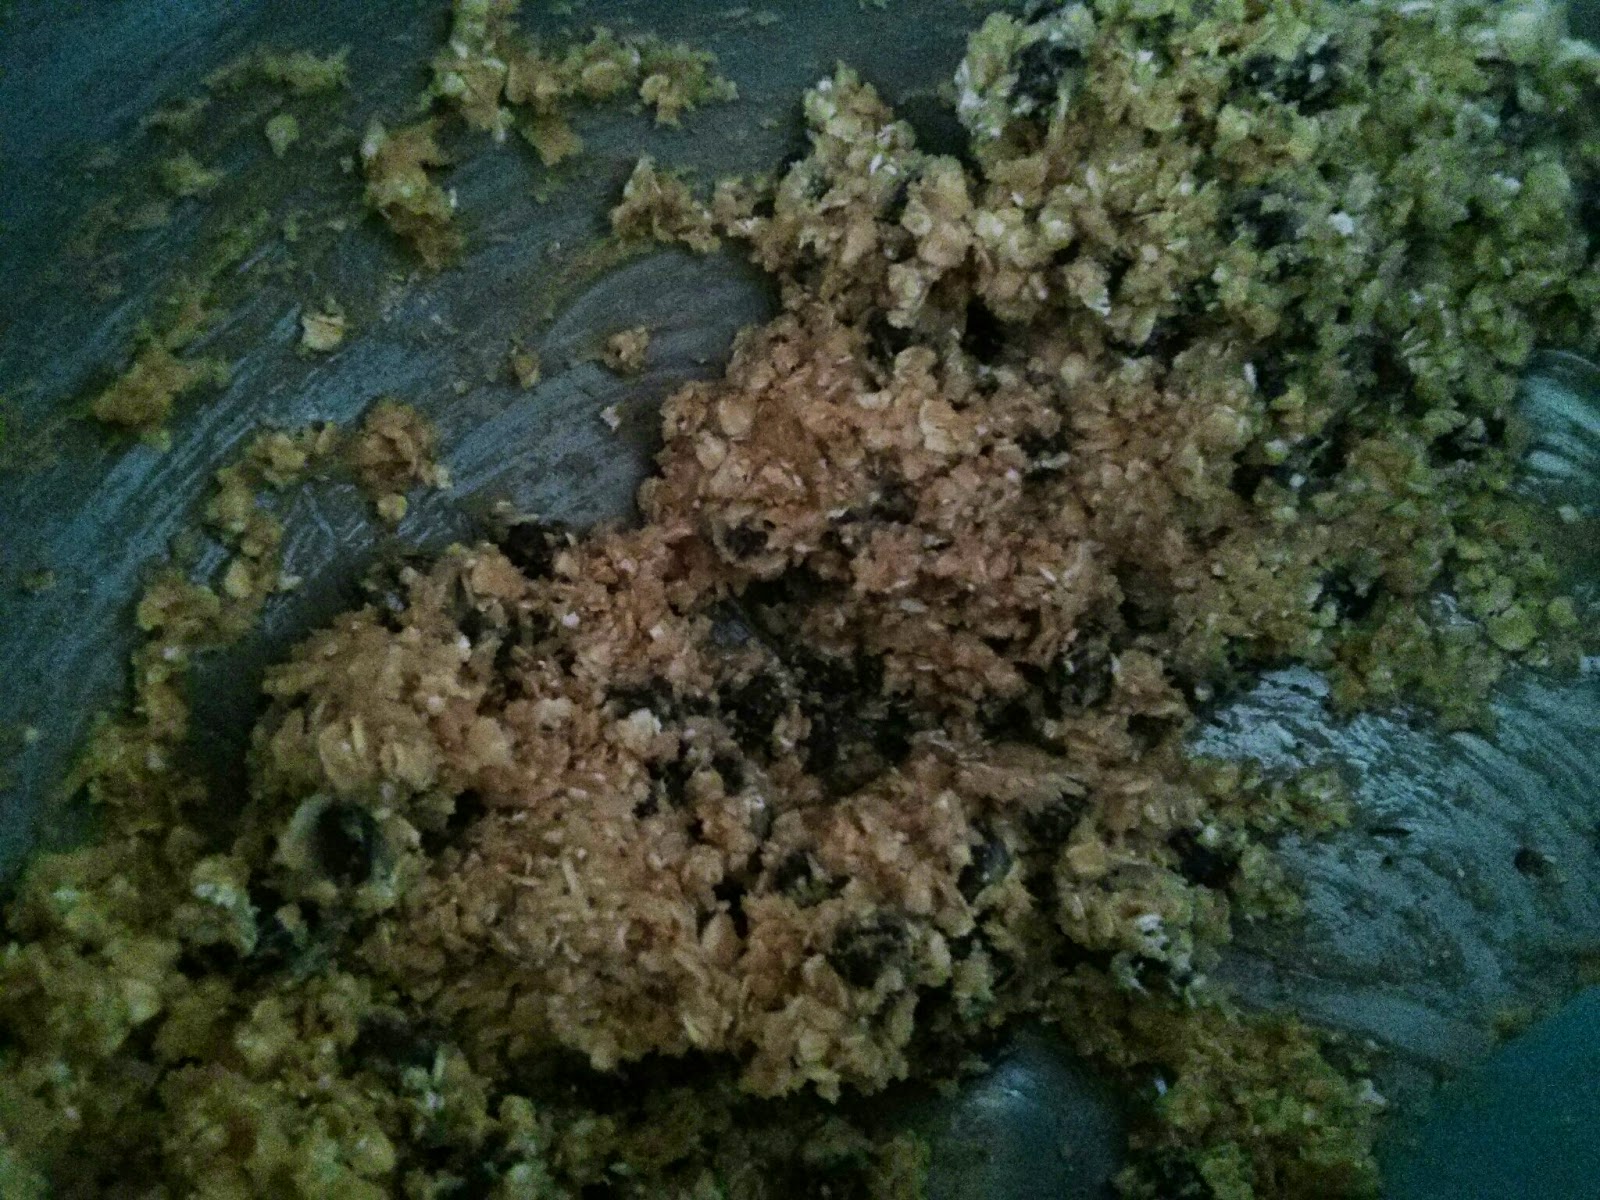
Once again, I started by placing the bananas right in the mixer bowl and let the paddle mash the bananas.  Then I added the flour and oatmeal.   Once that was well combined, I added the remaining ingredients.

Then you can roll out the dough, I always use a heart shaped cookie cutter for Lily.  They bake at 350 for about 30 minutes.

Sunday, February 22, 2015

Cinnamon Chocolate Chip Scones

There is no better treat than homemade breakfast during the week!  On Friday, our schools had a two hour delay so I was able to whip something up for breakfast. I usually make pancakes (from scratch) because that's what my mom always did.  I decided not to because I made pancakes last week and caught the stomach bug.  Let's say I wasn't ready for pancakes again.

On that note...

As I stayed snuggled up in my bed and on Pinterest, each recipe I thought sounded great, I didn't have all of the ingredients on hand.  Then I remembered seeing a pin for Chocolate Chip Scones that looked good.  For whatever reason, I hadn't pinned it.  I found the recipe for Chocolate Chip Scones from Sally's Baking Addiction.  Luckily, I had everything I needed (basically).


Ingredients:
-8 Tbl. of unsalted butter (cut into chunks)
-2 C. flour
-2 1/2 tsp. baking powder
-1 tsp. cinnamon
-1/2 tsp. salt
-1/2 C. heavy cream
-1 egg
-1 tsp. vanilla extract
-1 C. semi-sweet chocolate chips

I used the same measurements that were posted on Sally's Baking Addiction.  My only ingredient change was that I didn't use the mini semi-sweet chocolate chips. The scones were great with regular chocolate morsels.


The process I used to make the scones differed slightly.
Here's what I did:
First, cut the cold butter into chunks.  Place it in the bowl of the stand mixer.  Stir in the flour.  Allow the flour and butter to mix until the butter is broken into small, pea-sized pieces.  Then add the remaining dry ingredients.


In a separate dish, gently whisk the heavy cream, eggs, and vanilla.


Next, pour the liquids into the dry ingredients and mix until well combined.  Last, add the chocolate chips and stir until the chips are nicely distributed.


Once your dough is set, I divided it into two mounds of dough.  I rolled out each mound of dough to about a 1/2 inch thick disc.  Then I divided each disc into eight slices and placed on a baking sheet covered with parchment paper.  This resulted in 16 scones.  I baked the scones at 400 for 17 minutes.

I was a fan of these scones! I decided to call them Cinnamon Chocolate Chip scones because the cinnamon flavor isn't subtle.  This process for using the mixer is the same way I make all of my scones now.  This method has worked out well for me and was the one I shared back here with Lemon Cream Scones.


As always, happy baking!

Sunday, January 25, 2015

Chocolate Chip Oatmeal Cookies: The Next Attempt at my Go-to Recipe

Without realizing it, my third recipe selection for my new, go-to chocolate chip cookie recipe also comes from AverieCooks.  This is the same blog where my previous recipe came from.

This week I made "The Best Oatmeal Chocolate Chip Cookies" from AverieCooks.  On the blog, Averie shared that this recipe was based off of her Oatmeal Scotchies recipe.  As I looked the recipe over, I thought it looked very similar to my Oatmeal Raisin cookies so I made some adjustments to the original recipe.

Awhile ago, before searching for a new go-to recipe I tried yet another recipe from Averie Cooks for Soft and Chewy Oatmeal Coconut Chocolate Chip cookies.  Pat and I both loved these cookies!  They used coconut oil instead of butter and also have shredded coconut in them.  Pat has become a fan of coconut, which is why I decided I would try out that recipe.  However, we both that they were a good cookie, but really should be Oatmeal Coconut Raisin cookies.  Of course, I tested that out. This time, we thought the cookie was good, but that my go-to Oatmeal Raisin cookie was better.

That being said...

Here is my adapted recipe for "Oatmeal Chocolate Chip Cookies" from AverieCooks.

Ingredients:
1 large egg
1/2 C unsalted butter
1/2 C light brown sugar
1/4 C granulated sugar
1 tablespoon vanilla extract
3/4 C all-purpose flour
1/2 teaspoon baking soda
1 tsp of salt*
1 1/2 cups old-fashioned whole rolled oats (I used quick cook)*
3/4 C all-purpose flour
1/2 teaspoon baking soda
1 tsp of salt*
3/4 C semi-sweet chocolate chips*

Begin by creaming the butter and sugars.  Next, mix in the egg and vanilla.  While the mixer is on a low speed, add the baking soda, salt, and flour.  Stir until well combined.  Then add in the oatmeal.  Finally, mix in the chocolate chips.

Form large balls of dough and flatten slightly.  Bake at 350 for about 10 minutes and enjoy!


My adaptions:
As I mentioned, I wanted these to be chocolate chip cookies, not chocolate chip cookies that you wished were oatmeal raisin (because that should never happen!).   
  • The original recipe called for 1/2 tsp to a whole tsp of cinnamon which I omitted.  
  • Once again, I put in my usual amount of 1 tsp. salt, where AverieCooks suggested a pinch.  
  • The original also called for either raisins or nuts, and I omitted because I didn't want the cookie to be a trail mix cookie; I wanted a chocolate chip one.
  • AverieCooks also said not to use quick cook oats, but I always use them when I bake, so I figured I should with this recipe too.
  • I also cut back on the chocolate chips.  I know you're probably surprised!  But this recipe is about half of what my normal recipe is, but the recipe was for the same amount of chocolate chips.
  • This dough also required refrigeration. I skipped that step because frankly, I didn't see the point.  This is quite similar to my oatmeal raisins and that doesn't get refrigerated.  Also, with all of the adaptions I made, it was quite similar to my current go-to recipe and that also does not get refrigerated.
Thoughts?
I thought the cookies were great! They were the most soft cookies I have made in the last 3 attempts.  I made them four days ago and they are still soft.  Even with my adaptions because of the amount of oatmeal, Pat thought that they should have been oatmeal raisin cookies.  He did love the cookie dough though- thought it tasted like my regular dough!  I have one more recipe to try that a friend sent my way, but then I think I am going to tweak my current go-to and share the results- it's similar to this adapted recipe.  

Happy baking!

Monday, January 19, 2015

The Search Continues: Chocolate Chip Cookies

This weekend I decided to try out another chocolate chip cookie recipe.  These cookies were good, big step up from the recipe I shared last week. This week I tried out a recipe from Averie Cooks.  Their recipe for "The Best Soft and Chewy Chocolate Chip Cookie."


Here's my slightly adapted recipe from Averie Cooks:
(I changed the salt and chocolate chips).

3/4 cup unsalted butter, softened 
3/4 cup light brown sugar, packed
1/4 cup granulated sugar
1 large egg
1 teaspoon vanilla extract
1 teaspoon baking soda
1 tsp. of salt
2 cups all-purpose flour
one 3.5-ounce packet instant vanilla pudding mix
1 C. of semi-sweet chocolate chips

Cream the butter and the sugars.  Add the egg, vanilla, baking soda, and salt.  Then mix in the flour.  I always mix in 1 cup at a time.  Next, add the vanilla pudding mix.  Stir in the chocolate chips.

Scoop the dough into large balls, then flatten.  Refrigerate for at least two hours.  Then pull out the chilled dough and bake at 350 for about 11 minutes.  

Here are my thoughts about the cookies:
     *The cookies are soft, but I definitely wouldn't call them chewy.
     *The cookies  have a nice flavor.  I was afraid between the vanilla pudding mix and the vanilla extract that the cookies would be too vanilla-y.  Also, I am VERY glad that I put in my usual 1 tsp. of salt, instead of the pinch of salt recommended by Averie Cooks.  
     *I find it inconvenient to have to refrigerate chocolate chip cookie dough- it's not like the cookies get rolled.
     *The cookies have a short shelf life.  I made the cookies Saturday morning, now Monday morning, the cookies are no longer very soft.
     *Adding pudding mix to your go-to chocolate chip cookie recipe, seems annoying.  I wasn't so sure of the purpose of using it.  I found on Seasoned Advice that the purpose is like cornstarch- to help soften your cookies.  I'd prefer to add cornstarch, instead of buying instant pudding mix for my cookies.  
     *The depth of the cookies were nice and noted by Pat and a dear friend.  


I'll try out a few more recipes, but I think I am going to end up making some minor tweaks to my current go-to recipe.  

Sunday, January 11, 2015

The Hunt for the Best Chocolate Chip Cookie

Chocolate chip cookies are a staple at my house!  When I was little, we would make chocolate chip cookies all the time.  My mom still makes them regularly and keeps them in the freezer- she prefers them frozen.

I could go on and on about my love for chocolate chip cookies and the regularity in which I make them too.  I do have to admit...I've made them a lot less frequently since I've become pregnant.  Let's face it- one of the best things about chocolate chip cookies is getting to eat the dough, which I can no longer do!

My first regular (okay, my mom's first regular) chocolate chip cookie that I made was Crisco's.  We would use margarine instead of Crisco though.  Then we mixed it up and started using unsalted butter. Those days were years and years ago.

The second regular chocolate chip cookie recipe was the Nestle Toll House one. You know, the recipe right on the bag of chocolate chips.  I am sure nearly everyone has made this recipe.

Then one day, probably 10 plus years ago, my mom discovered an even better chocolate chip cookie. This recipe was from a friend and I adapted the recipe many times.  This recipe was the perfect mix of chocolate, salt, and even included oatmeal (a healthy cookie! haha).  Lately, these cookies have been too crunchy for my liking, but I LOVE the flavor.  Recently, I have decided that it is probably time for a new go-to chocolate chip cookie recipe.  So I have begun a hunt!

I am going to taste test various chocolate chip cookie recipes until I find my new go-to!  I will share my thoughts on each recipe.

My first attempt at a new go-to comes from Host the Toast.  The recipe is for "The Best Chewy Cafe-Style Chocolate Chip Cookies."  I picked this recipe for a few reasons:  the pictures of the cookie look incredible and she talks about how soft the cookies are and even mentioned that they may be softer on the second day.  I followed the recipe exactly.


Here are my thoughts:

  • The cookie has a nice buttery flavor.
  • The cookie was soft, but only for a few hours...
  • The cookie could really use more salt.
Adaptions to consider to my current go-to:
  • Try adding cornstarch, like in this recipe.
I know that I am doing you all a big favor by trying out all of these chocolate chip cookie recipes...It really is a burden having to taste test all of these cookies! Stay tuned for my next attempt at the best go-to cookie recipe.

Saturday, August 23, 2014

Chocolate Sheet Cake

My mother-in-law asked me to make a Very Hungry Caterpillar cake for my cousin's baby shower.  I was very excited to be asked, but of course terrified of messing up!  For several reasons:
1.  Google Very Hungry Caterpillar cakes and you will see the good, the bad, and the UGLY.
2.  I've never made a sheet cake larger than 9x13 before.
3. A baby shower cake is a lot of pressure
4.  My favorite chocolate cake recipe loves to fall apart.
5.  Would I decorate using 1,000,000,000 different colors or use fondant?
6.  How do you transport a cake that size?

I spent a lot of time researching recipes and tips and tricks for large cakes.  I thought about trying different techniques with my favorite chocolate cake, but wanted to be safe.  I decided to make King Arthur Flour's Favorite Fudge Cake.

To ensure the cake would successful be removed from the pan, I not only greased and floured the pan, but I also used parchment paper.  Then I greased and floured the pan again.  I was baking the cake in a 12x18" cake pan that is 3" deep.  I started by doubling the recipe since makes a 9x13.  After seeing what that amount of batter looked like, I decided to make one more batch (so yes, I ended up tripling the recipe for a 12 x 18" pan).

Having read other blogs and baking forums, I decided to bake the cake at 325, instead of 350.  I debated about using the flower nails or Wilton's Bake Even Strips, but I decided not to use either.  The batter was very easy and quick to prepare.  However, I ended up baking the cake for over 1.5 hours!!!

Please look at large this cake is in comparison to my tiny oven!

I thought the edges/ center were interesting.  The cake was cooked the whole way through!


Phew!  My large cooling rack helped!


Anyway after allowing the cake to cool for 10 minutes and saying a big, long prayer that cake came out of the pan effortlessly and yes, in tack!

This morning I woke up super early to get decorating! I was going to have my husband cut a piece of plywood to fit in my large cake carrier.  However, he was sound asleep.  What did I do?  I cut a piece of drywall to fit the cake carrier using an utility knife and wrapped it in aluminum foil.  It worked quite well!

I ended up using my Decorator's frosting, instead of my classic buttercream.

First, but on a light crumb coat.

Then,  allow the crumb coat to dry.  During this time I decided to get to work on my fondant.  I cut out my shapes by hand and used the book to guide me.

Once, I had a general feel for my fondant caterpillar, I frosted my cake.  A trick a learned in a cake decorating class is to use Viva Paper towels to smooth the cake.  Viva isn't textured.  I have even decided to use the fondant smoother to help "iron" out the frosting.
Ironing out the frosting
The "bottom" of the cake has been smoothed out.  See the difference?


I used gumballs for the border.

Then I put out my caterpillar.  I made a cute little strawberry for the caterpillar to eat!

                               
I used the Wilton candy pens to add a face to my sun and dots to the strawberry. To accent the blue gumballs, I decided to write the Congratulations to the Mommy to be in blue.

Here's the finished product:

What do you think?


Sunday, August 10, 2014

300!

As I wrote a few posts ago, my goal was to get to my 300th Pinterest recipe before school started.  I would like you all to note that I did it with 11 days to spare!  Yesterday I made both my 299th and my 300th recipes. 300 new recipes is quite a lot, so I debated about what might be grand enough for my 300th pin.  I looked through my Recipes to Try board and new 300 was going to be a dessert.  I looked at crazy layered cakes I had pinned, different cookies, cupcakes, bars.

I settled on what I kept calling Million Dollar Bars.  Turns out, (as I looked back at the link to write this post) they are called Cookie Dough Billionaire Bars.  I found the pin from Kevin and Amanda's blog. The original idea for this recipe however came from a book called the Cookie Dough Lover's Cookbook.

This recipe has four different parts to it and let me tell you...all four parts go oh, so well together in this bar!  There is a shortbread layer, a caramel layer, chocolate chip cookie dough layer all topped with chocolate ganache.

The only layer that gets baked is the shortbread layer.  Preheat the oven to 325.  Line a  9x13 pan with parchment paper.  Cream 2 cups of butter with 1 cup sugar, and 1/4 cup brown sugar.  Beat in 3 3/4 cups of flour and 1/2 tsp of salt.  Spread into the bottom of the pan and bake for 30 minutes.
Looking at the blog post, my shortbread layer turned out much thicker.  Next time, I will halve this part of the recipe.


While the shortbread is baking, work on the caramel.  I halved this recipe from the start because the original post said to store the other half in a jar.  I don't know about you, but I don't need to keep a jar of caramel laying around.  I'll find too many uses for it!

Melt 1 cup of sugar over medium heat.  Then add 6 Tbsp. of butter.  Once the butter and sugar are well mixed, remove from heat and stir in 1/2 cup of heavy cream and 1 Tbsp of sea salt.  The recipe asked for fleur de sel, which I couldn't find at the store so I substituted for the sea salt.  Pour the caramel over the shortbread layer (once it has cooled).

Next up- my favorite, the cookie dough layer!  This is an eggless cookie dough recipe since it doesn't get baked.  This was a good cookie dough and you could substitute it if you had a different favorite.  I cut the mini chocolate chips by 1/4 cup because there were oodles!

Cream 1 cup of butter with 1/2 cup of sugar and 1/4 cup of brown sugar.  Mix in 1 Tbsp. of vanilla and 2 Tbsp of heavy cream.  Then mix in 1 1/2 cups of flour.  After tasting it this far in, I decided to add 1 tsp of salt.  I always use unsalted butter and this cookie dough needed a little boost.  The salt made a huge difference! Finally, stir in 3/4 cups of mini chocolate chips.  End by spreading the cookie dough on top of the caramel layer.  I then froze the bars while I worked on the ganache.

I had to add this photo to show the caramel sneaking through the dough!


For the ganache, heat 1 cup of heavy cream with 1 Tbsp of vanilla until it simmers. Then pour over 1 1/2 cups of dark chocolate chips.  All this to sit for several minutes, then whisk until smooth.  Drizzle on top of the cookie dough.  Let the ganache set for about 30 minutes before serving. Then, enjoy!


Since I was calling them Million Dollar Bars, Pat said that they should really be called Million Calorie Bars.  Definitely a fitting name for this as well!

Yum! So I took these bars down to visit my sister and on the car ride home, my mom asked what my top 10 Pinterest recipes were.  My next few posts will be working my way through my top 10 favorite Pinterest recipes.  Stay tuned!


Friday, July 4, 2014

Happy Fourth of July: Celebrating with Something Sweet

Happy Fourth of July!  I am going to a Fourth of July party and of course decided I'd bring something sweet to share!

Sorry that my weekly posting streak ended.  Between the end of the school year recital, an AMAZING trip to Seattle/ Alaska, and coming home to a flooded basement...there hasn't been to much baking happening.

As I posted in my Easter Cake Pop post, I wanted to try to make the cake pops that get baked in the mold. Pat bought me two for my birthday (back in March) and I just got around to testing them out.  I decided to use the recipe that came on the box with a few adaptations.

This recipe is adapted from Nordic Ware's Fudgy Cake Pops:

Ingredients:
1 1/2 C. of semi-sweet chocolate chips
2 sticks of butter
1 1/2 C. of sugar
6 Tbsp. of unsweetened cocoa powder
4 eggs
1 tsp. pure vanilla extract
1 1/2 C. of flour
1 tsp. of salt

For the cake pops you'll then also need lollipop sticks, melting chocolate (I use Make 'n Mold), and what ever decorations, such as sprinkles.

Melt the chocolate chips and butter on the stove top over low heat (I did 3).  Continue to stir until it is all melted.  While I was stirring, I added the sugar and cocoa powder to my stand mixer.  Once the chocolate was melted, I poured it into the mixer as well.  Then add the eggs one at a time. Next, add the vanilla.  Finally, mix in the flour and salt until well combined.

I used my cookie dough scoop to then fill in my cake pop mold.  They baked at 325 for 18 minutes.  This recipe is doubled and it made 42 cake pops.  My adaptions to Nordic Ware's recipe was I doubled the salt and added the tsp. of vanilla.

Once the cake pops cooled, I dipped the sticks in melted chocolate and inserted the stick into each cake pop.  After that had cooled, I dipped the cake pops into the melted chocolate.

For the American flag, I used Make 'n Mold's dark red, dark blue, and white chips.  I used about 1/4 of the bag of the white, 1/2 of the bag of blue, and 2/3 of the red.  Six of the cake pops were blue with white sprinkles for the stars ( I couldn't find star sprinkles); 18 of the cake pops were red with white stripes.

And here you go!


I made little American flag cake pops with my extras!

I would definitely make cake pops again by baking them in the mold. It was less messy!  Can't wait to try out other flavors! Enjoy your Fourth of July!


Monday, June 9, 2014

Stress Relief: S'mores Cupcakes

The last day of school with my kids is Thursday! I cannot believe how fast this year has gone- I am sure going to miss this class, a lot!

I came home from school just felt overwhelmed with school stuff, dance stuff (recital is SATURDAY!), and just around the house things.  The only thing that seemed to make sense was to bake! Baking and eating chocolate is the perfect recipe to reduce stress! I looked at my Recipes to Try Board and looked for recipes that we had ingredients for, so Marshmallow Filled S'mores Cupcakes it was.  The recipe came from Sally's Baking Addiction.


I whipped up some chocolate cupcakes. I divided my batter between 12 cupcake tins only and I started with the wet ingredients, then mixed the dry in.


After the cupcakes were baked and started to cool, I whipped up the marshmallow filling. It was incredibly sweet!  I used my "cupcake plunger" to core the center.

Once that step was done, it was time to make the frosting! This chocolate frosting is very rich. After piping the frosting, I sprinkled on graham cracker crumbs...

But wait! That isn't the end...
Then in the broiler toast 12 marshmallows and place one on top of each cupcake.

Then it is time to dig in! The cupcakes were quite rich and incredibly sweet! They are very good and will make them again (especially when I have a reason to bake cupcakes).

The final step is back to wash some more dishes...

Sunday, May 25, 2014

Quick and Tasty: S'mores Pie

I had my coworkers over for dinner Friday evening.  We were making our homemade pasta in our favorite, creamy prosciutto and pea sauce. 

We made a TON of pasta...

I had thought about s'mores for dessert that we could make with the fire pit, but I knew I'd have disappointed company if I didn't bake anything.  I remembered my coworker had commented on a Pinterest recipe some time ago so I figured to investigate.

I found the recipe for S'mores Pie through Two Peas and Their Pod.  Two Peas and Their Pod link the recipe to Tasty Kitchen.  The recipe honestly took less than 5 minutes to make and that included using the food processor to get graham cracker crumbs.  

After I quickly made the crust and finished assembling the pie, I told Pat that if this was tasty this recipe might become my go-to "I'm bringing dessert" recipe.  Let's say this recipe was a crowd-pleaser and will definitely be made again! 

The recipe calls for you to sprinkle chocolate chips on top of the top crust- I sprinkled chocolate chips in between every later.  A little more chocolate can't be a bad thing...right?  Another thing that I will do differently next time is divide the dough for the crust.  I'll put 2/3 of the crust on the bottom and use the other third for the top.  
The recipe said to allow the pie to cool completely.  I let it cool for about 30 minutes so it was still warm and gooey, but not following apart.  This was so good and was even good with a cup of coffee the following morning ;).

This was my 261 recipe I've made from Pinterest!  My hope is to get to recipe 300 before school starts back up in the fall- August 20 is my deadline.  That's about 17 recipes a month I need to do make for the next three months.  I'll be quite busy in the kitchen!

Thursday, May 1, 2014

Chocolate Chip Banana Bread

I have made a bunch of different banana bread recipes- what else would I do with my "too ripe" bananas?

Yesterday, I came across a recipe for Streusel Topped Chocolate Chip Banana Bread from Barbara Bakes and it seemed the perfect recipe to try out with my super ripe bananas.

I made a few minor adaptions to the recipe:

  • For the bread:
  • 2 cups all-purpose flour
  • 1 teaspoon baking powder
  • 1 teaspoon baking soda
  • 1/4 teaspoon salt
  • 1 cup smashed very ripe bananas 
  • 1/2 cup sugar
  • 1/2 cup plain yogurt
  • 2 eggs
  • 1/4 cup butter, melted
  • 1 teaspoon vanilla
  • 1 cup semi-sweet chocolate chips
  • For the topping:
  • 1/4 cup sugar
  • 2 tablespoons all-purpose flour
  • 1 1/2 tablespoons butter, melted
I ended up needing to bake the banana bread for 75 minutes at 350!  Which is crazy! I don't know if that was because I swapped the sour cream for yogurt or what, but I've never had to bake banana bread for so long! The banana bread rose a lot! It is very deep. If I were to make this again, I would substitute some brown sugar in both the bread and the topping.  I think I might also add some more banana, it was not very bananan-y.  The 1 cup of chocolate chips was perfect to have a taste of chocolate in every bite.